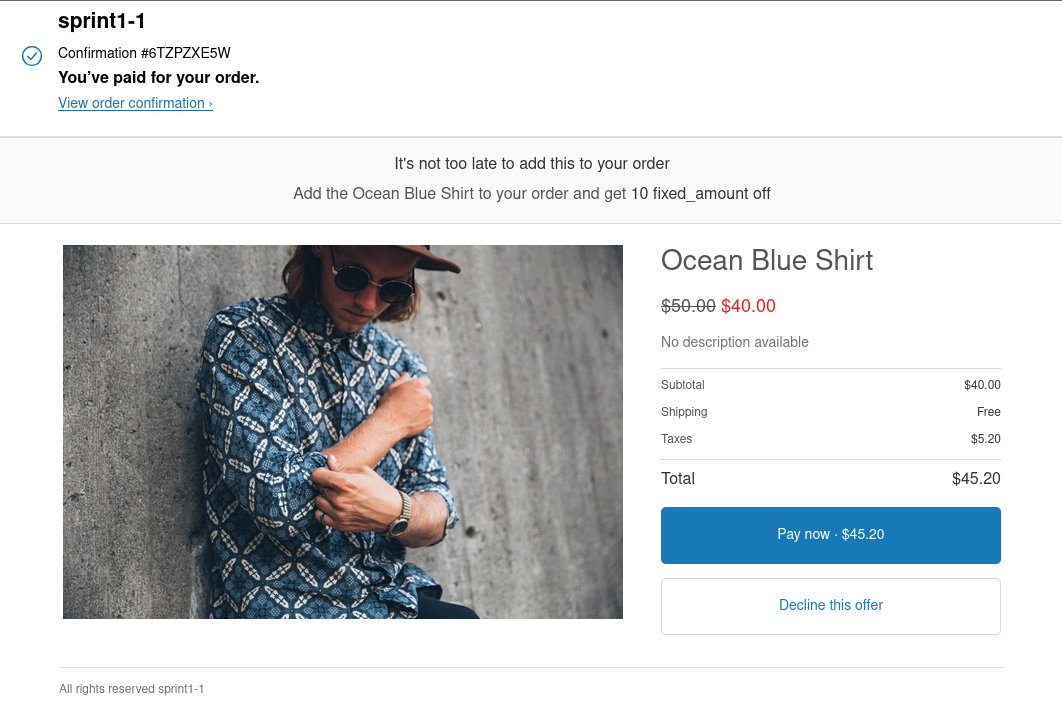
Post Purchase Upsell
Post Purchase refers to the period immediately after a customer completes payment but before they land on the order confirmation or thank-you page. This is a high-conversion opportunity to offer additional products or services (upsells or cross-sells) while the customer is still engaged and trusting.
Step 1: Enable Post Purchase Upsell
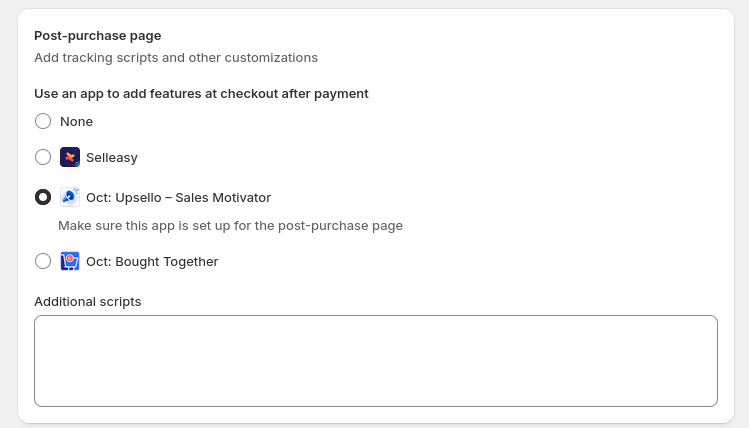
Click on the Post Purchase section in the app sidebar. If you see a callout card prompting you to enable post-purchase upsells, click the Take Me There button. This will redirect you to the Shopify Settings > Checkout section.
- Scroll down to the Post-purchase page section and select our app from the dropdown.
- Click Save to confirm the change.
Step 2: Create a Post Purchase Offer
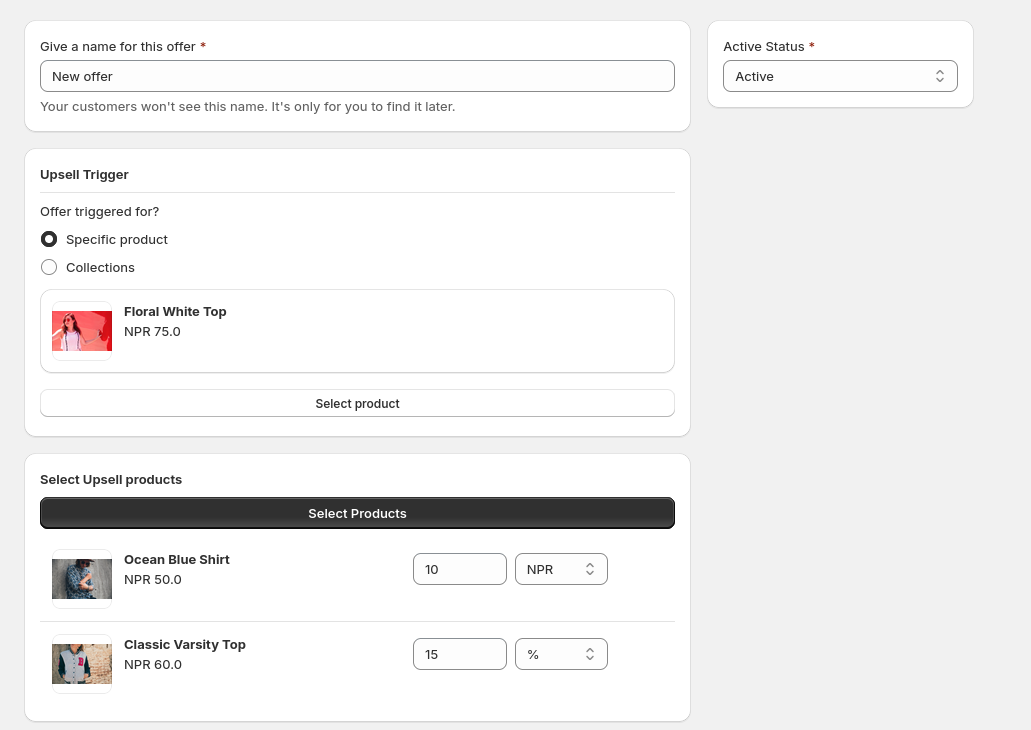
Return to the app and click on the Create New button to start setting up a new post-purchase offer.
- Enter a name for your offer and set its status (active/inactive).
Step 3: Set Up Upsell Trigger
Define the product(s) or collection(s) that will trigger the post-purchase offer.
- Choose the specific products or collections to act as triggers.
Step 4: Set Up Upsell Product
Select which product you want to show as an upsell offer.
- Choose the upsell product.
- Enter the discount value and choose whether it is a percentage or a fixed amount off.
Step 5: Test on Storefront
To verify the offer, go to your storefront and search for the trigger product.
- Click the Buy Now button for the product.
- Complete the checkout process by entering personal and card details.
- After payment, you’ll be shown the upsell offer, which you can easily accept or decline before reaching the thank-you page.