Auto Tag
Automatically add or remove tags from customers and orders based on specific events and conditions. This feature helps automate your workflows and customer segmentation efficiently.

Step 1: Create New Auto Tag Rule
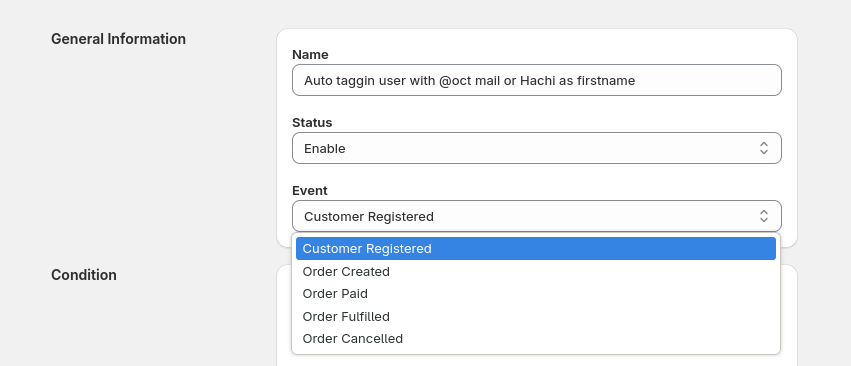
To begin, navigate to the Auto Tag section from your app sidebar and click on the Add New Rule button.
- Give your rule a unique name, set its status to active or inactive, and select the event that should trigger this rule.
Step 2: Define Conditions
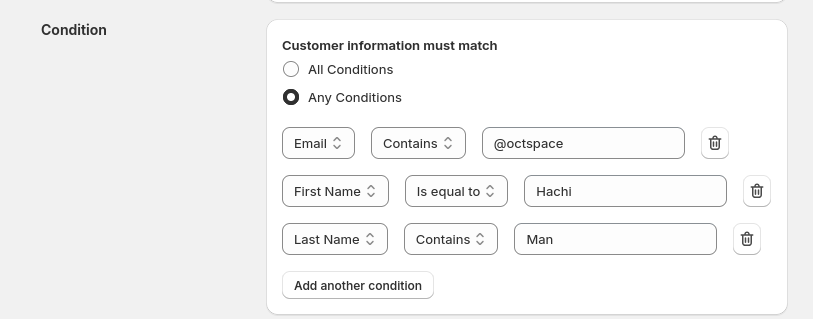
Specify the conditions under which this rule should apply. You can base your conditions on customer details or order attributes.
- Choose whether to match all conditions (AND logic) or any condition (OR logic).
Step 3: Set Tag Actions
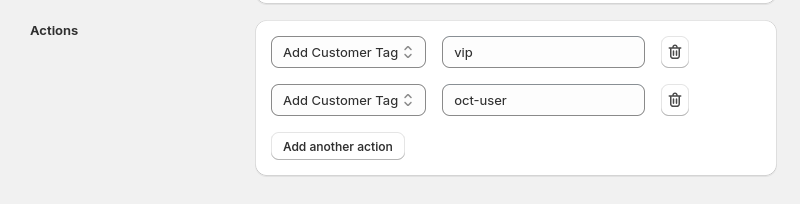
After defining conditions, select the action you want the rule to perform.
- You can choose to add or remove tags from either customers or orders.
Step 4: View Tag History
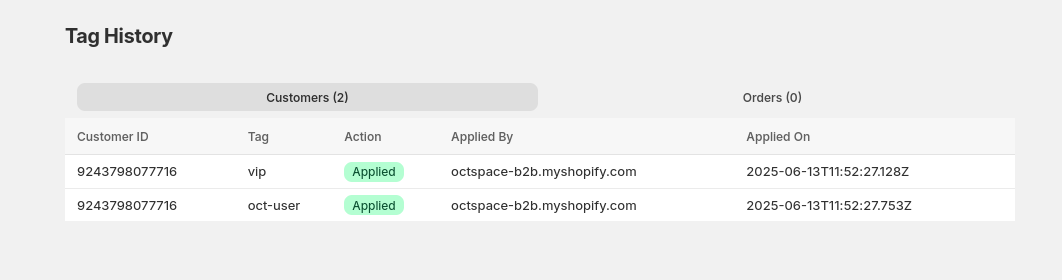
To review tag changes applied by auto tag rules, go to the Tag History tab from the sidebar.
- You will find two tabs: Customers and Orders, showing detailed logs of tags applied or removed.
- Each entry includes the tag name, action performed, who applied it, when it was applied, and the related customer or order ID.