
Add Custom Search Template File
Follow these steps to create and insert a new Liquid template file that outputs structured search data (ID, tags, variants, price, collections) in JSON format. This is useful for custom storefront logic or API integrations.
Step 1: Access Theme Code Editor
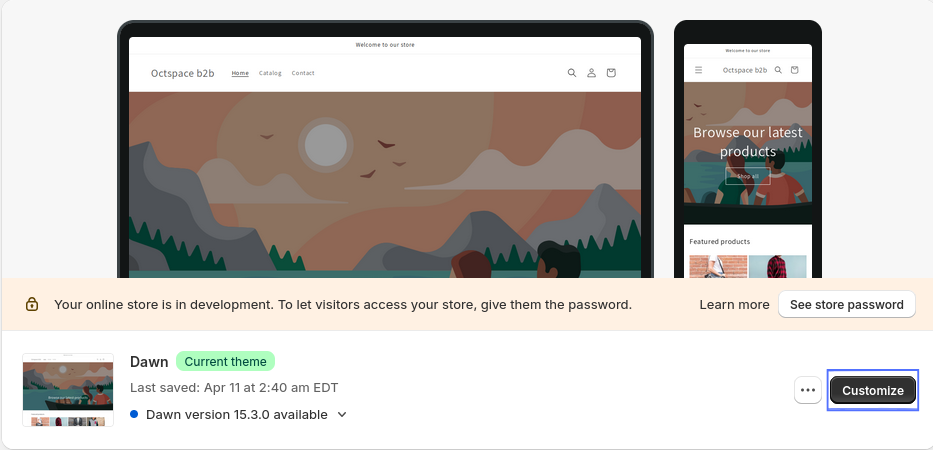
- From your Shopify admin panel, go to the Sales Channels section and click on Online Store.
- Click on the Customize button for your current theme.
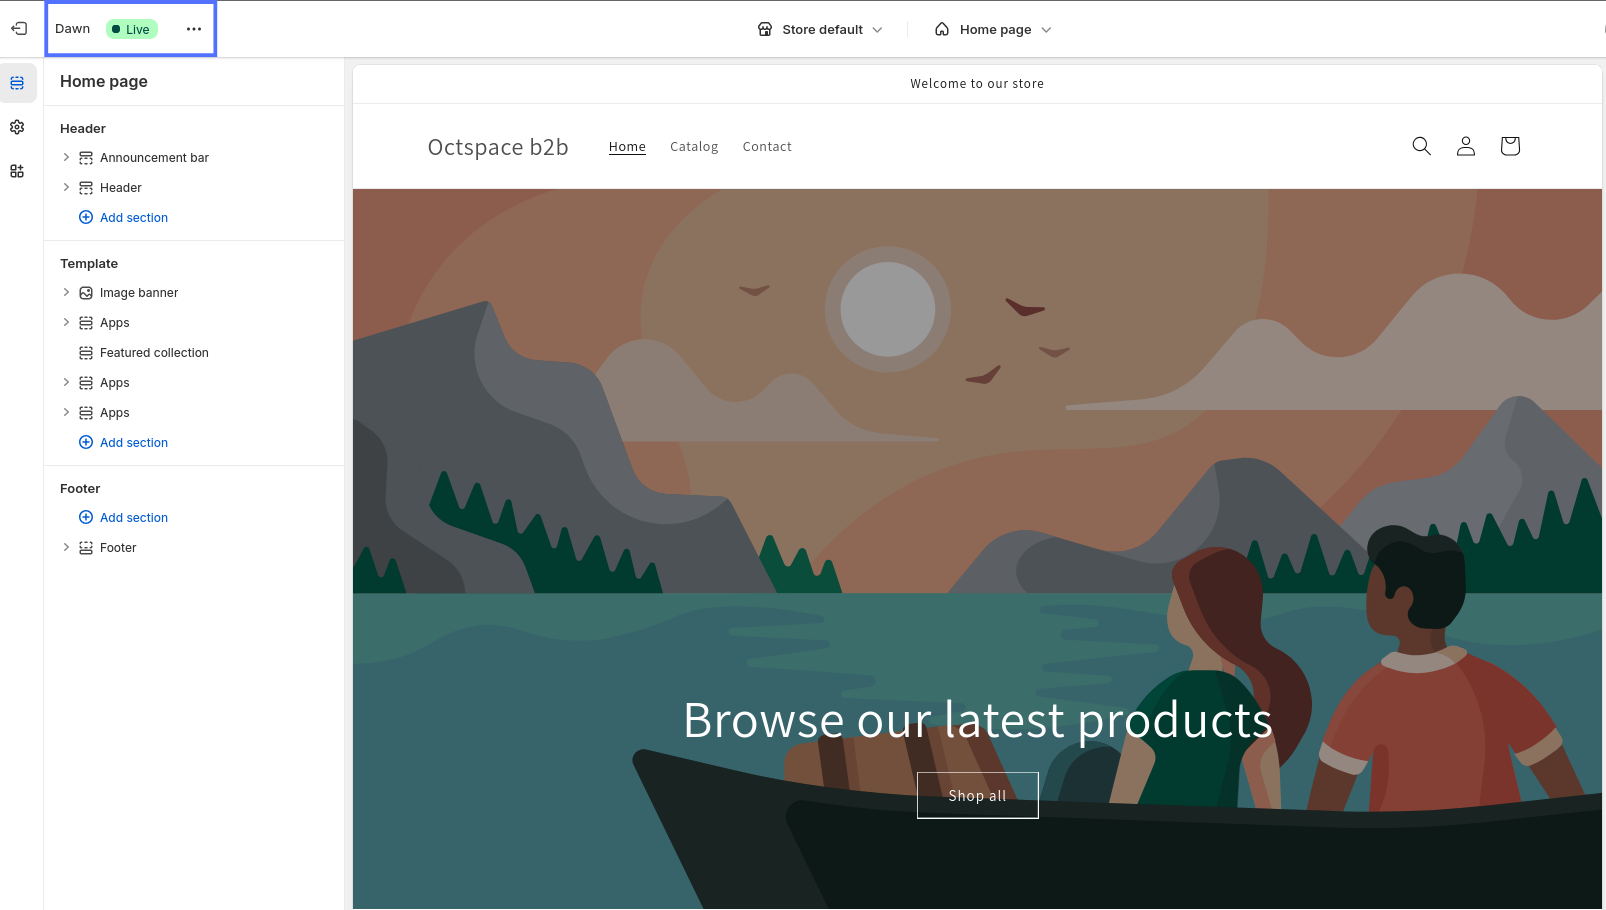
- In the top-left corner of the Theme Editor, click the three-dot icon (⋮) and choose Edit Code.
Step 2: Create New Template File
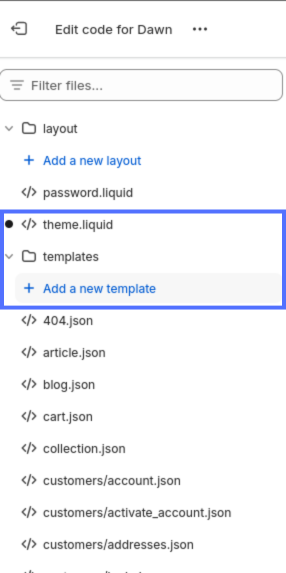
- In the left sidebar, scroll to the Templates directory.
- Click on Add a new template.
- Choose search as the template type, then choose liquid and name the file:
search.oct.b2b. - Click Save to generate the new file.
Step 3: Paste Custom Code
Replace the contents of the newly created file with the following code:
{% raw %}
{% layout none %}
{% paginate search.results by 50 %}
  [
    {% for item in search.results %}
        {
            "id": {{ item.id | json }},
            "tags": {{ item.tags | json }},
            "variants": [
                {% for variant in item.variants %}
                    {
                        "id": {{ variant.id | json }},
                        "price": {{ variant.price | json }}
                    }
                    {% unless forloop.last %},{% endunless %}
                {% endfor %}
            ],
            "price": {{ item.price | json }},
            "collections": [
                {% for collection in item.collections %}
                    {
                        "id": {{ collection.id | json }},
                        "title": {{ collection.title | json }},
                        "tags": {{ collection.tags | json }}
                    }
                    {% unless forloop.last %},{% endunless %}
                {% endfor %}
            ]
        }
        {% unless forloop.last %},{% endunless %}
    {% endfor %}
  ]
{% endpaginate %}
{% endraw %}
Step 4: Save Your Changes
Once you've pasted the code, click Save in the top-right corner of the editor to finalize your changes.