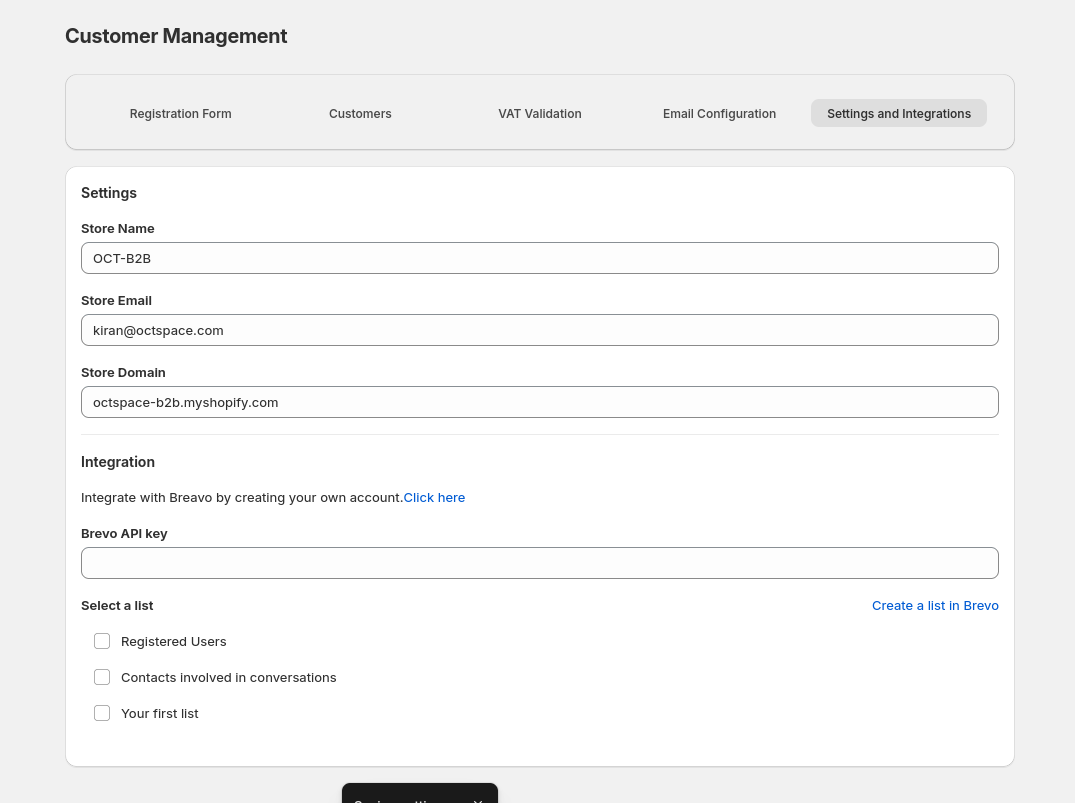
Manage, Approve and Notify Customers
Learn how to manage your registered customers, approve or reject their access, and notify them using dynamic email templates. This guide walks you through every step to ensure a seamless approval workflow for your B2B registration system.
Step 1: View Registered Customers
To get started, navigate to the Customer Management section from your app sidebar and select the Customers tab. Here you can view a list of all registered customers on your store.
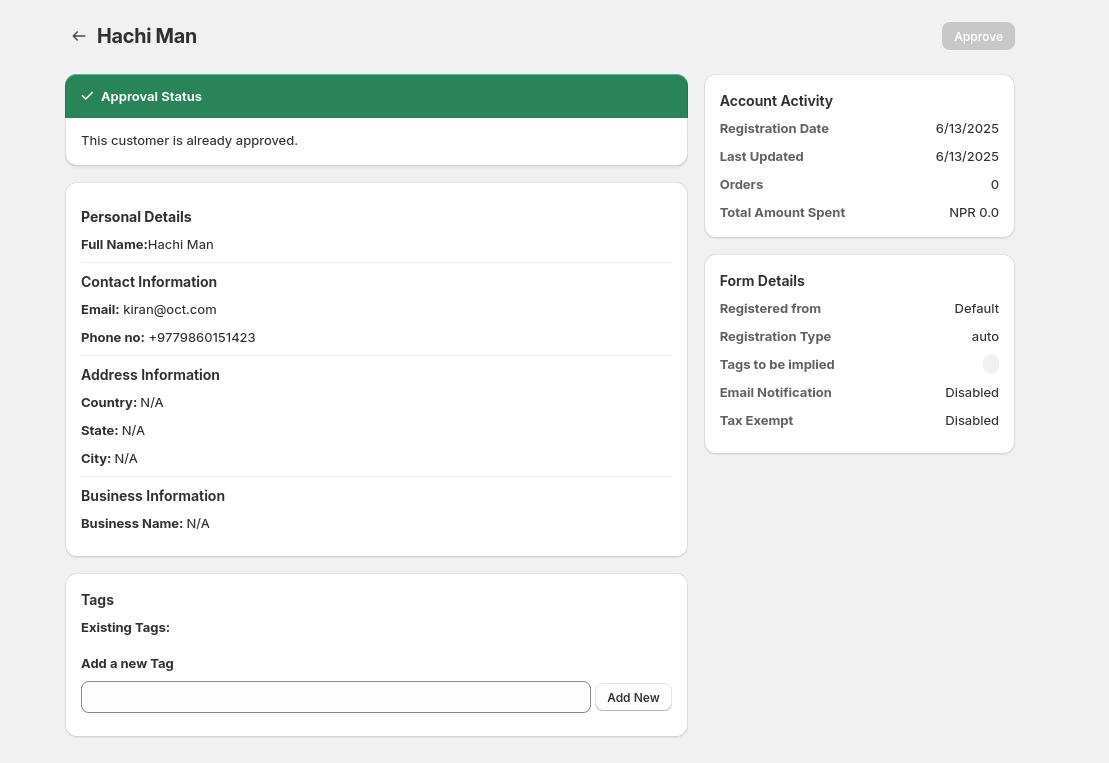
- Click on any customer to view their full profile, including personal details, contact info, address, business information, account activity, and submitted form data.
- You can easily approve the customer by clicking on the Approve button on the top right hand side.
- Add or remove customer tags dynamically from their detail view to help categorize or segment them effectively.
Step 2: Approve or Decline Customers
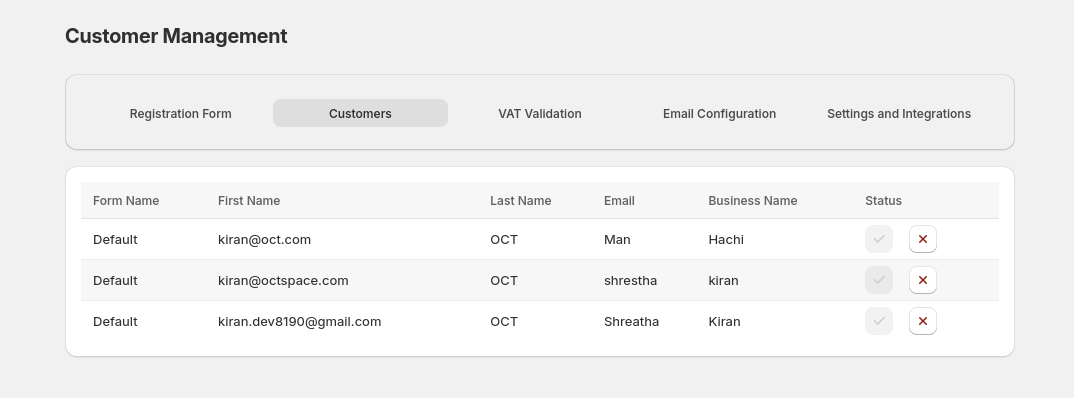
You can manage customer registration status directly from the customer list.
- Locate the customer you want to manage in the list.
- Click the Approve or Decline button to update their registration status.
Step 3: Configure Notification Emails
Automatically notify customers when their registration status changes or is under review by configuring email templates.
- Go to the Email Configuration tab from your app dashboard.
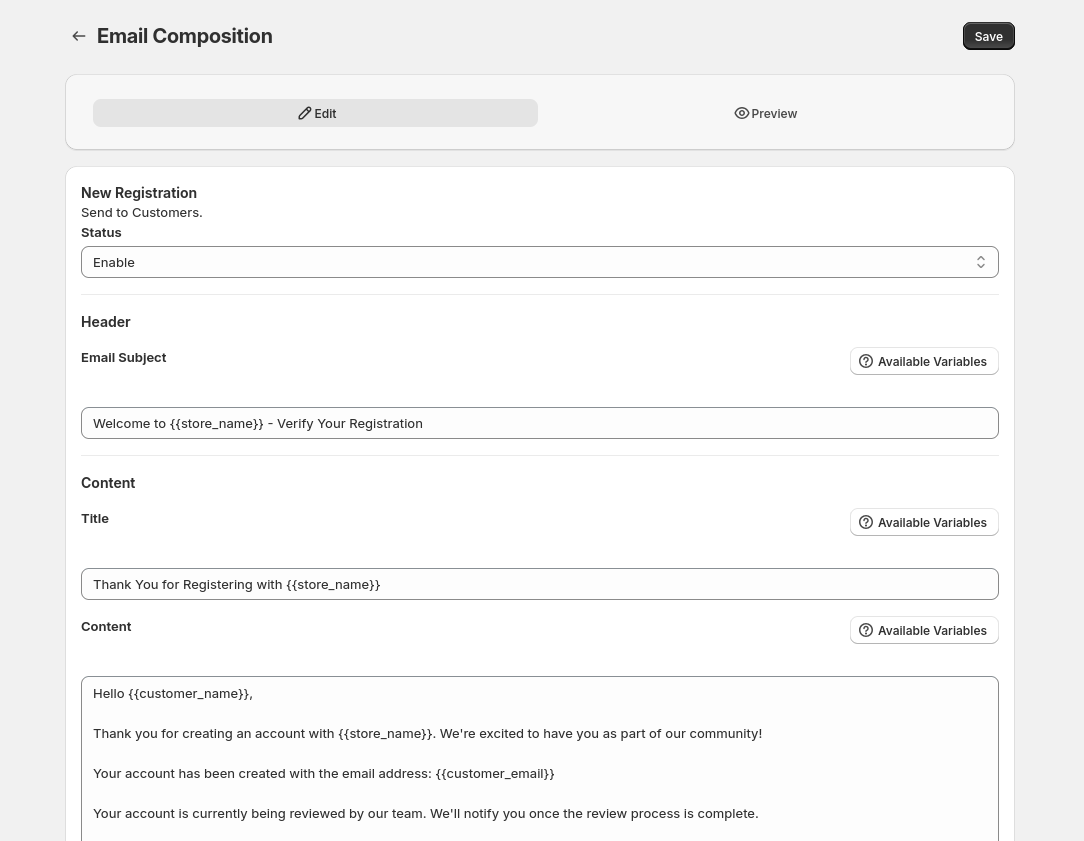
- Click the Edit button for any email type: new registration, approval, rejection, or under review.
- Customize the subject, title, content, and button URLs using dynamic variables for a personalized experience.
- Preview the email layout using the Preview tab before saving your changes.
Step 4: Set Variables & Integrate Brevo
Define global email variables and enable email delivery through Brevo.
- Navigate to the Settings & Integration tab.
- Set store-specific variables such as store name, email, and domain.
- To send emails via Brevo, enter your Brevo API key under the integration section.